Game Completion %: 5%
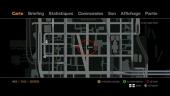
CARD
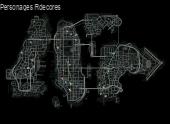
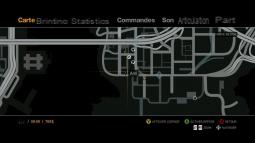
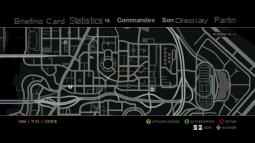
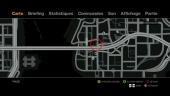
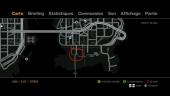
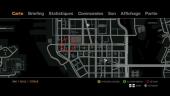
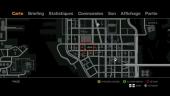
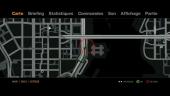
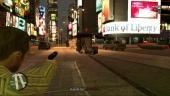
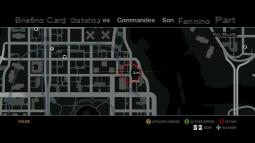
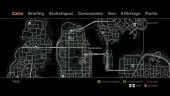
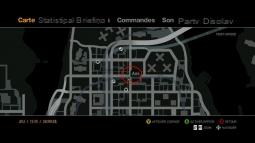
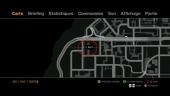
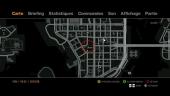
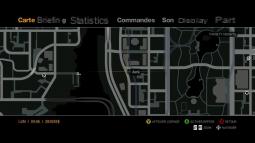
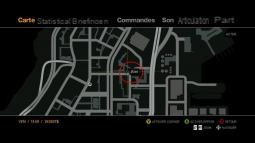
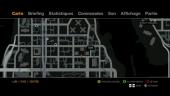
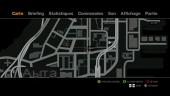
At certain times in the game, zoom in on your radar to see a "Friend" indicator appear, follow it and go see the person you meet to complete additional missions. Random characters only appear when you are very close to them. So follow our plans to find them all! Finally, certain conditions must be respected, we will indicate them to you for each case. Click on the map image to enlarge it and locate the location of each random character. Then refer to the information relating to each of them by consulting the paragraphs below.
Note: For characters that require several encounters, it is sometimes necessary for one or more days to pass before meeting them again. Finally, be aware that random characters count towards 100%, and also contribute to unlocking an achievement under Xbox 360.
1 : Brian (1)
2 : Brian (2)
3 : Brian (3)
4 : Badman
5: Hossan
6 : Sara (1)
7 : Sara (2)
8: Pathos (1)
9: Pathos (2)
10 : Jeff (1)
11 : Jeff (2)
12 : Jeff (3)
13: Cherise
14 : Eddie Low (1)
15 : Eddie Low (2)
16 : Marnie (1)
17 : Marnie (2)
18: Yvan
19 : Clarence
20 : Gracie
21 : Honey
22: Ilyena Faustin
23 : Jeff (3)
Brian
Special Conditions: Complete Roman's It's Your Call mission.
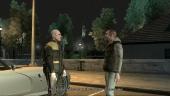
1st meeting:
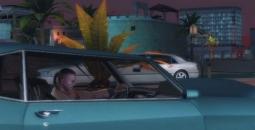
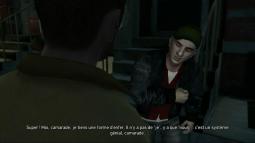
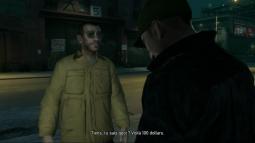
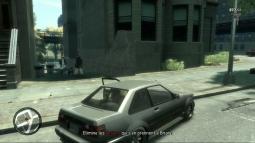
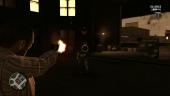
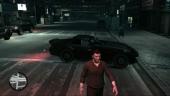
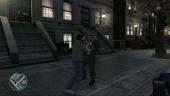
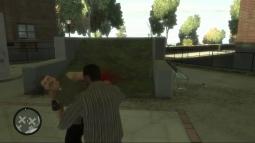
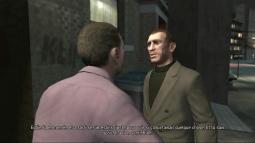
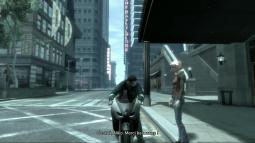
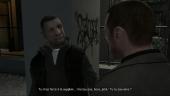
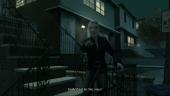
You will first find Brian near Roman's depot, after the It's Your Call mission. A simple conversation takes place between the man and Niko (picture1). At the end of it, you receive $100 (picture2).
1 picture
2 picture
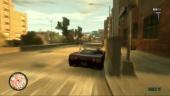
2nd meeting:
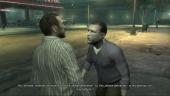
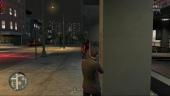
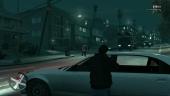
The second meeting with the young drug addict takes place near the Comrades Bar (picture1). This time take your friend to get more drugs (picture2), then drop him off to get $200 this time.
1 picture
2 picture
3nd meeting:
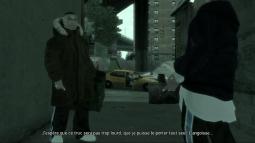
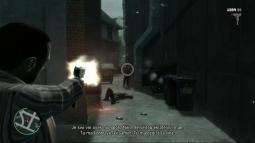
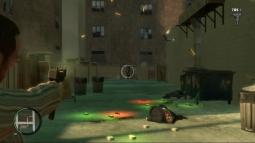
It is in the city center, very close to the roundabout with the arch that you will meet Brian for the 3rd time in a row (picture1). Your friend decides to quit drugs and asks you to come with him on a date with one of his ex-dealers. Steal a crate to take it there. Unfortunately, the dealer appreciates only very moderately the late payment and claims interest. Get out of the car to help your friend and kill the two men who are attacking him (picture2).
1 picture
2 picture
Badman
Special conditions: Complete Little Jacob's Shadow mission
Reward: $500
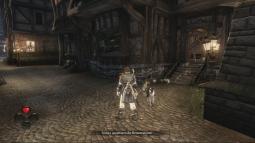
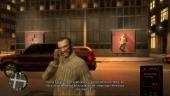
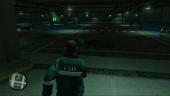
After completing the mission described above, go to East Island City (picture1), to find Badman sitting on a bench. Talk to him to get a new mission. Find a vehicle and drive Badman to the meeting point marked on your map. You have to overcome several mobsters (picture2). Kill them all to validate the objective of this mission.
1 picture
2 picture
Mel
Special Conditions: Complete Manny's Escuela from the Street mission
Reward: $500
Drive near the Schottler district to find Mel, the second random character in the game (picture1). Talk to the man so that Niko agrees once again to play the good Samaritans. You have to drive the man to an appointment which of course will turn out badly (picture2). Kill the creditor and his men, then bring Mal home to complete the mission (picture3).
1 picture
2 picture
3 picture
Ilyena Faustin
Special Conditions: Complete Manny's The Puerto Rican Connection mission
Reward: None!
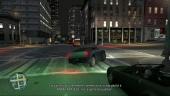
Take the path to the bowling alley to find Faustin’s wife on the bay (picture1). The Faustin girl seems to be hanging out with the wrong people once again and you need to go talk to her boyfriend. Run to the point on your radar to find the man (picture2). You have the choice between eliminating him or giving him a good temper, but this one will flee as soon as your small talk has stopped and it is therefore much easier to kill him. Your behavior will determine the tone of the telephone conversation that will happen a little later (picture3).
1 picture

2 picture
3 picture
Hossan
Special Conditions: Complete Manny's The Puero Rican Connection mission
Reward: $500
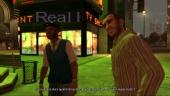
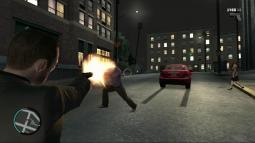
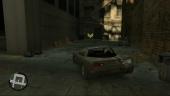
Hang around Garnet Street to find an old travel companion (picture1). You will have to bring Hossan to his employer to collect the money. Unfortunately for him, things will not go as well as expected (picture2). Follow the fugitive (try to recover a car that holds the road before the mission so as not to be left behind by his sports car) and open fire as soon as possible (picture3). After damaging your opponent's car enough, they should get out of their vehicle to face you directly. Eliminate him to recover Hossan's money, then bring the man back to his home to validate the mission.
1 picture
2 picture
3 picture
Sara
First meeting:
Special conditions: Complete Manny's The Puerto Rican Connection mission + Complete Hossan's mission + come to the meeting in the evening (from 22 p.m.)
Reward: None!
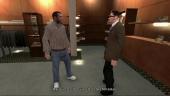
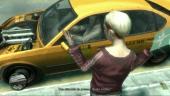
Drive towards Suffolk once you have completed the mission with Hossan to meet Sara (picture1). Agree to take her home by car (picture2) and when you get to her house, fight against her chubby husband to scare him away (picture3).
1 picture
2 picture
3 picture
Second meeting:
Special conditions: Come to the appointment during the day from 9 a.m.
Reward: $1000
Take the direction of Fishmarket South to find the miss for the second time (picture1). Even if Sara does not recognize you right away, she still ends up asking you for a favor: picking up a package from Perseus, an overpriced clothing store (picture2). Agree to go there and pay $500 for the package. Finally, bring the package back to Sara to finish this mission (picture3).
1 picture
2 picture
3 picture
Pathos
First meeting:
Special Conditions: Complete Manny's The Puerto Rican Connection mission.
Reward: None
Head to Star Junction to meet Pathos, a young rapper busy selling his roadside models (picture1). During the conversation that will follow, two men disembark and attack Pathos. Help him by eliminating the two thugs before Pathos passes by (picture2).

1 picture
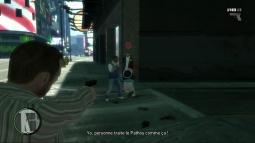
2 picture
Second meeting:
Special conditions: Varnish by appointment in the evening (from 20 p.m.)
Reward: None
Hang around not far from where you first met Pathos, to meet the man in the evening (picture1). Once again, the young rapper and victim of insult (picture2). But this time, he also gets a bullet in the stomach. Eliminate the kidnappers of the young man (picture3), then hurry to bring Pathos to the hospital to complete the mission.
1 picture
2 picture
3 picture
Jeff
First meeting:
Special Conditions: Complete the Playboy X Photo Shoot Mission
Reward: $1000
Go to East Holland to meet Jeff, a deceived husband (picture1). Accept his request and discreetly follow his wife in the car (picture2).
1 picture
2 picture
Arrived in front of the bar, go inside and go upstairs using the stairs on the right. You have to take a snapshot of the couple without being spotted. Position yourself on the left and zoom in to take a photo of the two lovebirds (picture3). Don't get too close so you don't get noticed, then exit the bar after sending the shot to Jeff (you should automatically be asked to leave the bar).
3 picture
Second meeting:
Special conditions: Jeff himself will call you to meet you a second time
Reward: $5000
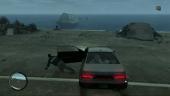
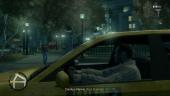
After Jeff’s phone call, a yellow dot indicating “Destination” appears on your map (picture1). Go to Lancaster and go down to the parking lot to find Jeff in panic (picture2). The body of his wife (dead it goes without saying) is indeed on the back seat of his car. Niko agrees to make her body disappear. Drive to the point indicated on your map to reach the bay. Along the way, the slightest crossing cop patrol forces you to flee to lower your index. Arrived at your destination, gain momentum and rush towards the water area. Jump from the vehicle before diving with it by pressing the button that allows you to get in or out of a car (picture3). Niko will then roll on its side and the body will disappear in its 4-wheeled coffin, drowned in the dirty waters of Liberty City...
1 picture
2 picture
3 picture
Third meeting:
Special Conditions: Complete Jeff's Mission 2
Go find Jeff so that he entrusts you with a new mission. The man will ask you this time to kill his new companion. Niko will refuse. Watch carefully to see the outcome of this sad affair...
Cherise
Special Conditions: Complete Playboy X's The Holland Play mission and of course save Cherise's life during Dwayne's Ruff Rider mission
Reward: None
You will find Cherise in front of the Northwood Cluckin' Bell (picture1). Approach the miss to start a new cinematic, then steer a car to leave to meet her boyfriend who beats her. On the spot, you can either kill or correct the man (picture2). Cherise prefers the second solution. The man defending himself rather well in hand-to-hand combat, it is advisable to go directly to the bat.
1 picture
2 picture
Eddie Low
First meeting:
Special Conditions: Complete Packie's Three Leaf Clover mission
Reward: None
Eddie, the psychopathic pervert, is first in Alderney City (picture1). This crazy man will hold an extraordinary conversation with you (picture2) before asking you for a favor. Agree to take him to the docks to get rid of his suspicious package (picture3). Then bring Eddie back to the destination to validate the mission.
1 picture
2 picture

3 picture
Second meeting:
Special conditions: Come at night
Reward: None
Drive to the Berchem district (look at our map to find its location) and you will find Eddie Low more excited than ever (picture1). At the end of it, Eddie attacks you with a knife and your task is to eliminate him. Take the time to step back so as not to catch his blade in the stomach and kill him from a reasonable distance (picture2).
1 picture
2 picture
Marnie
First meeting:
Special Conditions: Complete Packie's Three Leaf Clover mission
Reward: -500$
Marnie is a young needy junkie that you will meet near Alderney City (picture1). Accept her request (picture2) and drive her to her dealer to pay him for his drug (picture3). It is really nice our Niko, there's no denying it!
1 picture
2 picture
3 picture
Second meeting:
Special conditions: It may take a while before Marnie reappears for the second time, so be patient
Reward: -600$
Drive near Varsity Heights to find Marnie leaning against a lamp post (picture1). After a short discussion with the young woman, Niko decides to help her a second time by driving her to the station. Find a vehicle and quietly follow the path indicated to reach the yellow marker and validate the mission (picture2).
1 picture
2 picture
Yvan
Special Conditions: Complete Packie's Three Leaf Clover mission and save his life during Vlad's Ivan the Not So Terrible mission
Reward: $1000
Hang around Alderney to find Ivan, the survivor (picture1). Agree to accompany him in his attempt to recover money. This will of course turn into a shootout (picture2). Kill all the thugs and protect Ivan for the sake of the mission. Two enemies are posted to the right and left, above you. Don't forget to pick up all the money on the floor before returning to Ivan after the confrontation.
1 picture
2 picture
Clarence
Special conditions: Complete the Holland Nights mission having spared Clarence (wait several days after this mission).
Walk through the streets of Easr Holland to see Clarence not far from where the mission concerning him took place (picture1). Talk to the man to remember the joys of the past (picture2). Still resentful, Clarence quickly ends up facing you. Only one solution for you: shoot him down (picture3).
1 picture
2 picture
3 picture
Gracie
Special conditions: Wait approximately 3 days after completing the Diamond's are a Best Girl Friend mission.
Drive on the Acter side to spot the miss (picture1). Gracie has not forgotten you and even seems to still resent you for your little differences from the past (picture2). She then launches 5 guards towards you. Kill all the individuals to complete the mission (picture3). Back up to take cover and let them come towards you to get them one by one. One of them is posted from a balcony, keep an eye out...
1 picture
2 picture
3 picture
Écrit par Lox le08/07/20083 - Out of ComissionTOUT SUR THE LOST AND DAMNED